Sword Drawing Tutorial
There have been numerous weapons since the beginning of time that have given militaries an edge on the front line. Perhaps of the most widely recognized ha been the sword, which has seen numerous varieties over time. While they’re not utilized in fighting in present day times, they stay famous in films, computer games and different media.
Visit the Children coloring pages for kids’ education.
Regardless of this commonality, it tends to be shockingly difficult to figure out how to draw a sword! Fortunately, this guide will ensure it doesn’t need to challenge by any stretch of the imagination! Our bit by bit guide on the most proficient method to attract a blade 7 stages will ensure realizing this new drawing isn’t a fight.
Stage 1 – sword drawing
While working on this aide on the most proficient method to draw a blade, your life will be made a lot more straightforward in the event that you have a ruler close by to work with. You can involve it in this absolute initial phase, truth be told!
To kick this aide off you can start with a minuscule circle that will go toward the finish of the grip, or handle, of the sword. Then, utilizing that ruler we referenced before you can define two boundaries going down from this circle. At last, you can add a little square shape with adjusted corners under those two lines.
Stage 2 – Attract some a greater amount of the grip this step
During the current second piece of your blade drawing, you will essentially be drawing two additional little circles that will go on the handle. These circles will be going on what is known as the crossguard of the grip. These drifting circles might peer a piece awkward now, yet with the third step you will perceive the way they fit into the sword plan!
Stage 3 – Next, polish off the crossguard
We referenced in the past step how we will polish off the crossguard in this third step of our aide on the most proficient method to draw a sword, and we expect to remain by that! To start with, define a straight boundary that interfaces the two circles and furthermore contacts the lower part of the handle for your sword.
There will be a different line interfacing the lower part of the circles, however this one won’t be a strong, straight line. This one will have a slight plunge in the middle, as displayed in our reference picture. At long last, you can polish off the crossguard by drawing a little circle inside the center of it for some ornamentation.
Stage 4 – Presently draw the cutting edge of the sword
You’ll need to utilize your ruler again for this step of your sword drawing! To draw the sharp edge of the sword, you can broaden two genuinely lengthy lines down from the crossguard. Then, when you have those two lines drawn you can add two more modest ones that meet at a point like the one in our reference picture.
Stage 5 – Draw some itemizing for the handle
This drawing of yours is as of now looking truly perfect! In this step of our aide on the most proficient method to draw a blade, we will add some surface detail to the handle of the sword.
To do this, you should simply draw a progression of somewhat bended lines along the handle of the blade as displayed in our reference picture. Handles on swords are frequently covered with segments of cowhide, and these lines will assist with giving that appearance of calfskin for it. When you have these lines done, it’s on to a few last subtleties!
Visit for free hd photos kids.
Stage 6 – Presently, polish off the sharp edge and last subtleties
This 6th step of your blade drawing will see you adding a few last subtleties prior to polishing off for certain varieties. To get these subtleties going, first utilize your ruler to draw down the focal point of the sharp edge. This line ought to stop a piece before the tip of the blade. Where this line closes, you can then define two more modest boundaries to the edges of the sword.
The reference picture will direct you on how these lines ought to look. That finishes up the subtleties that we would add to the sword attracting this aide! Before you continue on, make certain to add any subtleties that you would like for your drawing. These could incorporate some foundation components like different bits of a knight’s stuff and covering next to it.
Now and again swords have decorative etchings on the edge, so you could include a few inscriptions to customize your blade, as a matter of fact! These are only a couple of thoughts that we had, however you can truly involve your creative mind for this! How might you polish off this blade drawing before the last step?
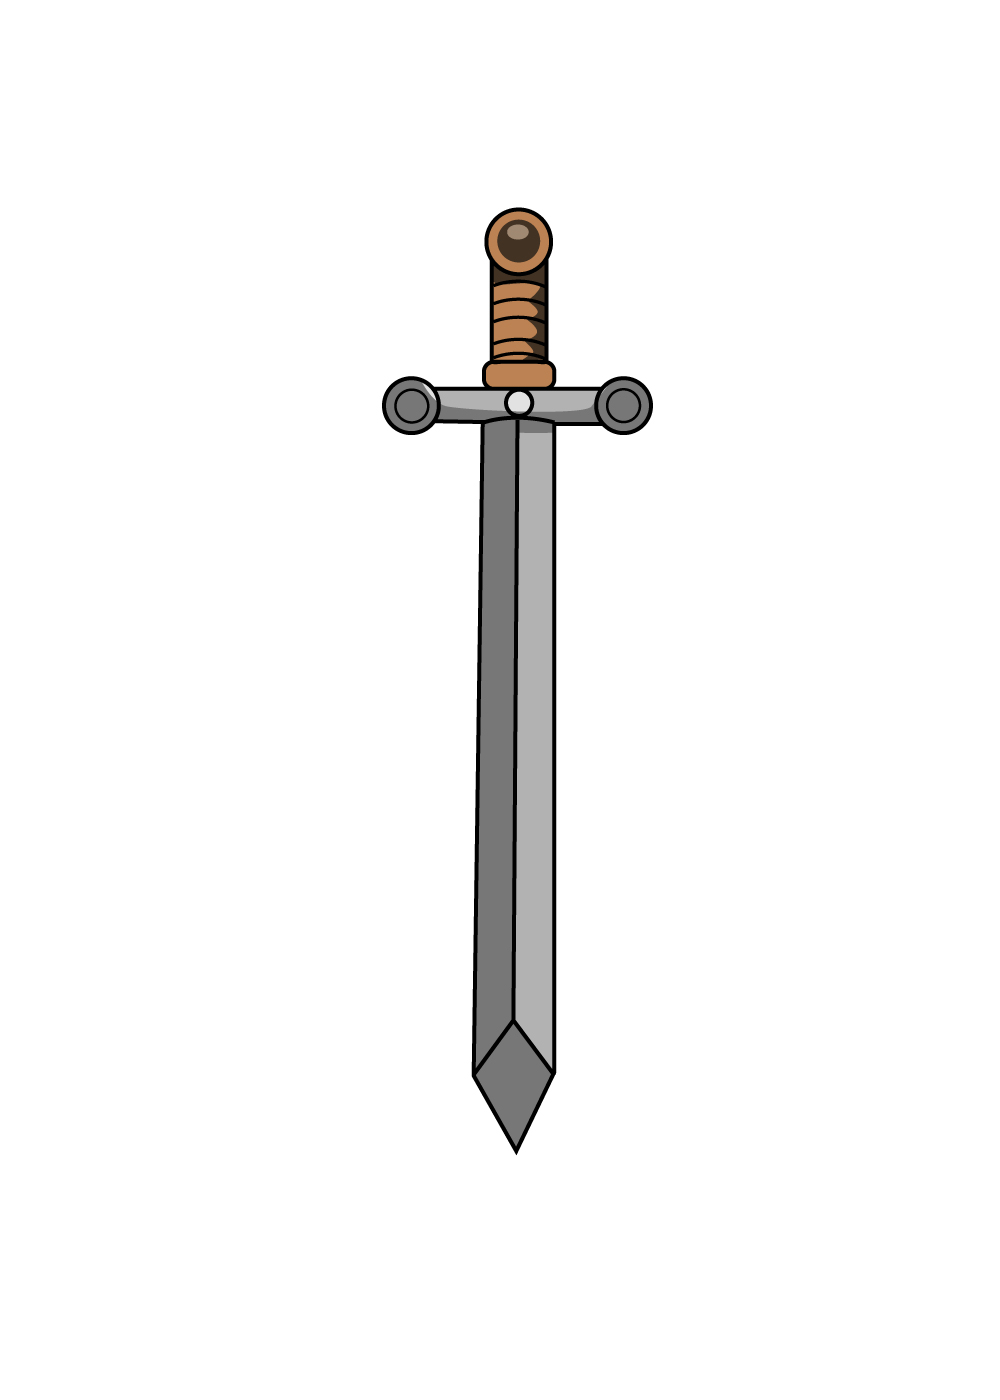
Stage 7 – Polish off your blade drawing with some tone
Since you have wrapped up drawing your great sword, you can complete the process of rejuvenating it for certain varieties in this step of our aide on the best way to draw a blade! We utilized a dim variety conspire for the sharp edge and afterward involved a brown for the handle to polish off that rough look we referenced for that area.
This is only one variety plot out of numerous that you could go for, but and you ought to go ahead and utilize any tones that you love for your sword! You could consolidate a gold to certain components, or even incorporate a reds and greens to a portion of the ornamentations to make it seem as though it has rubies and emeralds enhancing it.